Friday, May 6, 2016

Caterpillar Science!

Our life cycles unit is always one of my FAVORITE to teach. Somehow, I missed out on ordering caterpillars last year, so although some of my students have participated in this unit before, it was like new to them.
We received our caterpillars last week, and after they spent a weekend at my house getting comfy, I brought them to school to begin observing them. 
Five days and a couple drops/shakes/students trying to remove the cover later, there is a possibility that come Monday, we may have some chrysalises! 

Here are some of the fun things we did!

We read and watched The Very Hungry Caterpillar to kick off our unit. I had gotten this felt set a few years ago secondhand for free. It is missing a few parts, but it sure beats paying $50 for it!! One of my very talented paras is going to sew us a new apple and leaf. My students took turns adding the correct piece to our felt board to sequence the whole story. We reviewed it after each new piece was added, and I had one of my most reluctant readers labeling the story events by the end! 
We briefly went over the life cycle of a caterpillar, and as the days go by, we review which phase our caterpillars are in. 
We used our imaginations to picture our caterpillars eating some of the things in the book. It was hard to come to the conclusion that "real" caterpillars only eat leaves-how boring!
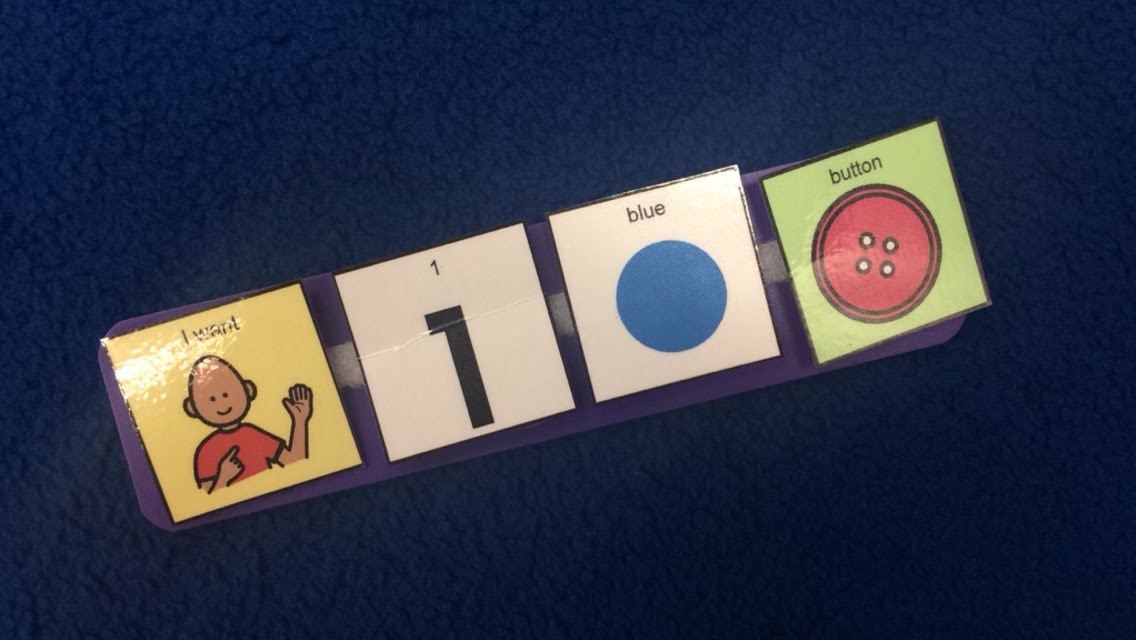
Every day, we come together as a group and pass the caterpillars around to make notes in our daily observation journals. This is something I created myself a few years ago, and the repetitive, predictable nature of it works really well for my students. It involves calendar work, counting, reading, measuring, colors, and visual motor skills for each page. The best part is the kids actually enjoy it because it is based around creepy crawly living things!! 

We are so excited for our caterpillars to turn into butterflies. Stay tuned! 

Wednesday, February 3, 2016

Topic Boards-Expanding Skills

In case you couldn't tell from my other posts, I am OBSESSED with topic boards! I know when I create one that I will have everything I need visual-wise for a lesson at my fingertips, which always makes everything go smoother! Also, I cannot stress enough how easy it makes building another layer of language into any activity. If you haven't seen it, check out my intro to topic boards here.

This is the third one I have done with my kids, and each time I get more ideas about how they can be used for so many different skills. Today, we made our 100th Day of School Snack Mix. The 100th day was technically yesterday, but with a parent meeting and Groundhog Day and so many other projects, this activity got pushed to today. Oops! :) I made this last year with my class, too, WITHOUT a topic board, and I remember it being a great activity for sharing, counting, reading, appropriate waiting, following directions, and fine motor skills. Little did I realize (then) what a perfect opportunity it would be for language, too! 

I made this one last minute because I thought of the idea about 5 minutes before lunch was over (literally one of my paras was cutting and velcro-ing while simultaneously singing the Days of the Week song in circle time!) Because of that, I didn't do my standard background colors to distinguish different categories. I plan to update it before labeling and storing it for next year. 

(I will post a picture of it tomorrow!)

This is the snack mix mat we used, which I originally found on TPT. (Hint: this is part of an awesome freebie pack for 100 days!!) 


Below are some of the skills we hit in this lesson: 

Yes/No
One of my kiddos with emerging language skills who is having a difficult time understanding and answering yes/no questions was getting antsy waiting for his turn! I quickly pulled off my yes/no pictures from the board and did a mini-session with him using a food he loves (goldfish) and one he hates (raisins) from our snack mix ingredients. ("Do you want xx?") He was not only handing over the correct picture after just a few trials, but also yelling YES in the loudest voice I have ever heard from him! 


Being Persistent and Correcting Requests
This is a higher level communication skill that requires students to respond to a communication partner's errors. We do it all the time in our lives. Think about the following conversation:
A: "Can I have two coffees; one iced french vanilla and one caramel?"
B: "Ok, so you want three coffees?"
A: "No, just two."
B hands A one coffee.
A: "I'm sorry, I actually asked for two coffees. I got the french vanilla, but I am still waiting for a caramel."

Without the ability to try to repair communication breakdown when one person makes an error, this customer would be really sad and slightly caffeine deprived. It is so important to teach our kids these valuable self-advocacy skills as well!! Using the pictures gives even verbal kids a cue to how they should try to fix the breakdown.

We touched on this skill today in a couple ways. After a request came, I would purposely either give students the wrong item or the wrong amount. They had to correct it by adding the "more" and "quantity" pictures to their sentence or stating no and presenting the request again. At first, I got some really confused looks, grabs, and a near-meltdown. But after a few times modeling it, they did great! One student loved catching my "errors" haha!
I gave her 9...she was quick to ask for "1 more m+m!"

2D:3D Matching
Some of my kiddos are working on recognizing 2D pictures and learning that they represent a real object. With one student, I checked her understanding of the picture by asking her to point to which ingredient she just requested from a field of 3 or to find the picture that matches the object. Great way to get some correspondence checks in for DTI or PECS kiddos! 
Changing her picture after getting a closer look at what was in the bag!

A little extra support for what he still needed was given by putting the pictures on his mat and swapping out with the actual food once he asked.

Following Directions
As with all of my topic boards, I put some pictures on that would be used just for adult directives or modeling. In this activity, I switched up the "conversation" every couple of times. Instead of validating their request by handing them the items, I gave them the box or bag and told them "Take 10 xx" using the pictures to support understanding. This provides variety and helps students learn that in a conversation, there can be more than one predictable response they need to distinguish between.
My direction back: Take 10 goldfish

Compromises
As an added bonus, one of my students got to learn about the power of compromise :) She is on a gluten-free diet, and about half of the ingredients in the snack mix contain gluten. We talked about what a compromise is and how to do an even trade. With the pictures from the topic board for support, she was able to "trade" her restricted ingredients with her para for some gluten-free alternatives we had in the classroom in the same amount. Instead of getting upset, she loved having the power to choose what she wanted to trade for! 
Swapping out cheerios for gluten-free cocoa cereal

It amazes me with each new topic board the many skills we are able to cover in just one lesson!! I never would have believed that making a snack mix could help with so many language concepts...and it is delicious, too :) 


Wednesday, December 23, 2015

Totally Awesome Topic Boards!

Have you ever used a topic board with your class? Do it!!

I have been reading about them for years, but I was hesitant to try it with my kids. I wasn't sure where to start or what I should put on one, since the range of abilities in my room goes from emerging-picture-discrimination to intermediate-verbal-speech. At the PECS conference I went to a few weeks ago (read about that here), the trainer briefly touched on them and assured us that, like PECS, they could be used with anyone.

The idea of a topic board is exactly that: a board that provides language needed to discuss a topic. It gives cues to people using visuals or words that are related to the topic at hand. In advanced classes or with older students, a topic board might have project or discussion ideas. With my kids, I would use topic boards for a specific game (think, "my turn, your turn, draw a card, this is fun!"), activity (think snack- "I want, more, cookies, juice, I'm full") or project (think, "I need, glue, paper, all done"). Topic boards, as opposed to picture communication binders or PECS books, are used with a group of students, so only one is needed. Students should always have their own modalities of communication available to them as well-never take away their voices!

I did a quick google search and found some excellent ideas. I knew I wanted to use it with a familiar activity so that my kids wouldn't be overwhelmed with two new things at the same time. Eventually, I found this idea on Pinterest and thought it was a simple enough place to start. I used one of Gabrielle Dixon's easy art projects from the Easy Art Year Long Bundle (available here!!) to base my topic board pictures on, since my kids are used to the directions and process of these projects.

I remade the steps of the gingerbread man so that I could add in more opportunities for language (I simply added more parts to them and added the steps of writing your name, putting on a piece of tape, and hanging them on our class-made gingerbread house). I gave each student their own set of directions, which they had to reference before making requests. Here are what my last four ended up looking like:


Then I had to decide which pictures to put on my topic board. I needed enough to fill the needs of my basic communicators, but not too many to overwhelm distractible eyes!
This is the layout I finally decided on.
 

I used an old Velcro book that I inherited from a former teacher, but you could just as easily make one out of a binder or a piece of cardboard with Velcro strips attached. I liked having two sides so that I could fold it in half to block some of the pictures for my learners who need a smaller field to choose from.

The color coding is optional, but I wanted my students to key into different parts of a sentence. There are a few things I would change about the color codes if I did it again. I organized it by category:
-sentence starters or requests-yellow
-descriptors-white
-objects (nouns)-green
-body parts-white
-comments-lavender
-yes/no-green/red

Most of my students have seen the sentence starters and other visuals before; in fact, you could even use these over and over with different activities. I like to keep these available to my students right on the topic board so they do not have to sift through their own binders/ipads/vocab/books to find them :) They are common enough for every use. You would just need to change the objects to reflect those in the activity.

This lesson was perfect! It was so easy to differentiate as I went along. For my beginning communicators, I worked with one picture at a time and placed it right in front of them to hand to me. For students a little further along, I used two pictures at a time and they had to choose the one they wanted. For my intermediate and advanced communicators, I used sentence strips. I used the ones from my students' pecs binders, but again, these would be really easy to make with a strip of cardboard and some Velcro. I followed the same guidelines as PECS and did not demand verbal language, but I was happy to see that two of my students were verbalizing their requests as they touched and "read" each picture, and one student was signing his requests using ASL and a model! I used the comments pictures mostly as a tool to model language to my students, holding them up as I made comments to them about their projects. Here is what one of the sentence strips a student handed me looked like.

I had five students at the table for this activity, and they each had to wait their turn for me to come to them (having a rolling chair really helps!!) I was thrilled that they were quiet and patient as they watched the other students. I think being able to see WHY they were waiting really helped them understand what was going on. I couldn't believe our group was at the table for over 30 minutes, and not a peep was heard! Everyone completed their projects and did a fabulous job.

This took a little time to create, but I think that in time it will be a shorter process as I get more practice making them. To store this, I printed a picture of what the topic board looked like and put it inside a quart-size ziploc bag. I labeled it with the activity name and put all the pictures inside it for easy reference in the future. I will definitely be using topic boards again for more activities!

Thursday, December 10, 2015

PECS Conference

After wanting to go for a couple years, I was finally able to attend a PECS conference this week so that I could be trained to use PECS with my kiddos! I had picked up some information from my SLPs over the past couple of years, but I am very much a concrete visual learner, and I need everything presented to me in an organized format!

If you have not gone and think this might be something you might use with your kids (or even if it isn't something you THINK you might use), I highly recommend going. I was lucky to attend with a coworker of mine, and the two of us were able to put our heads together and brainstorm for our kids right during the conference. By the time we got back, we were ready to immediately apply the strategies we learned!

I think the biggest point that our trainer made was her comparison to living in a foreign country. You might know some words, be able to gesture, forge your way through a sentence using some words from English, but it is a struggle. But the one universal language we have is pictures. The same applies for students learning to communicate. Even if your goal is verbal communication, why not give them a strategy that will not only help them in the meantime, but is also research-proven to get them talking faster?

Sounds good to me :)

To find a conference near you, just head over to their website for listings and to sign up.

Wednesday, November 25, 2015

Thanksgiving in Room 19

This week we had our second annual Thanksgiving Feast.
Last year, this was one of those over-ambitious projects that popped into my brain...generally what happens with these is I mention it and my staff stares at me like I have 5 heads :) But somehow, we always pull it off.

One of the ongoing themes we have in my room is community. We have actual community themes we learn about, beginning with self and family and expanding to neighborhoods, community helpers, and our town. In addition, however, we also foster the idea of community with everything we do in our classroom. It is really important, especially for my group, to feel like they belong and to understand what it means to be part of a group.

I decided on the idea of a Thanksgiving dinner last year after using some of Jenna Rayburn's adaptive books (find them here) with my students and realizing they did not even know what a turkey was, let alone understand the concept of Thanksgiving dinner. Many of my ideas stem from things we might consider just a part of life, but might be a little more challenging for kids who have not experienced them. This was no exception!

We began planning for our feast a week in advance. As a class, we used books to find pictures of things you would find at a Thanksgiving dinner. Everyone got their own set of vocabulary picture cards to keep in their word wallets (that will be another post!) that they practiced throughout the week. We also used another one of Jenna Rayburn's resources to talk about social skills at Thanksgiving. Using a social story was a great way to talk about what to expect and how to act.

The Preparation
We spend one and a half days preparing for our meal-it is a rule that everyone has to help cook. I am SO lucky to have a wonderful group of adults who all contribute to our feast by bringing in ingredients, spices, cookware, or whatever else we need! We might get more excited than the kids! I basically set up stations throughout the room-each table has a different dish, complete with picture directions (sometimes they have to be put in order, sometimes they are already labeled), the ingredients with corresponding pictures in front of them, and all the other materials needed (bowls, pans, etc). We are really lucky to have a stove/oven in our school (and a staff that doesn't mind my kids occasionally invading the staff room to cook!), so the ONLY prep that is done beforehand are things that would need someone to monitor at the stove. This is usually only the boiling of potatoes and squash. Literally, we cook a turkey at school.
These are some of the tables ready to go!

At the same time, we are setting up our room. This is a GREAT way to imbed even more skills! We work on 1:1 correspondence by deciding how many chairs we need for the amount of people we have coming, setting the table using picture cues, name recognition, copying from a model when we make placemats, and so much more! This was our table this year. 

The Feast
We usually have our feast two days before Thanksgiving (way too crazy to try on a half day!) Over the past two years, we have invited many people to our feast, including our principal and assistant principal, general ed classmates, teachers, and our custodian! Our assistant principal was SO looking forward to it this year she offered to supply the juice. It really helps everyone make a connection to my kids and for my kids to form connections in a meaningful way with important people in our school.
I tried something different this year and let kids "earn" the first plate based on their behavior the same day. It really helped some of my friends who have trouble with this stay on track throughout the day!! Everyone else has to wait their turn.
Sidenote: I am a big proponent of waiting as a skill!! It is so overlooked but SO important! I am always thinking about real-life situations, and try to imagine myself in a family's shoes. If I can help them be able to go out to eat as a family or to stand in a check-out line with their child because I have practiced the skill of waiting with that child, I feel like I have done my job. If I can help a student be able to succeed in a supported work environment where they are not instantly handed their materials, then I feel like I have done my job. :)
We all eat together and have to stay at the table until everyone is finished (again-more waiting!!). The kids do surprisingly well with this and enjoy watching their friends eat just as much as doing it themselves. I do let my early finishers work on their packet at the table, too.

The Aftermath
When they are done, students have to indicate this either by signing, speaking, or using a picture or switch. They bring their plates to the garbage and push in their chairs. We were lucky to have a LOT of adult help with washing dishes this year, because let's be honest, that's the worst part! 
We use a checklist based off of Jenna Rayburn's interactive book, Do You Like It? (see the link above!) This works on yes/no concepts and reinforces vocabulary, recall, and questioning.
I try to get around to each student individually to ask them about their favorite part, but next year I hope to do it in a group! 
We pack up any extras and make plates to deliver to people in our school who were unable to make it to the feast. Below is an email our school custodian sent-the kids LOVED how much he enjoyed it!! 

Thanksgiving is one of my favorite times of the year, and Thanksgiving in Room 19 is maybe the best part for me. 

Monday, October 26, 2015

Word Wallets

Everyone has their own way of organizing student visuals, flashcards, and sight words, but somehow these always seem to be everywhere but where they are supposed to be!!
In my room, we have vocabulary for each unit we do, and each student has their own set of pictures. Multiply an average of 10 pictures times 9 units times 6 kids and you get a lot of 3x3 inch square pieces of paper floating around the room. Ahh!!

I want to share an easy tip that works really well and adds to student independence! Every student has a small coupon expandable folder that we call their "word wallet" (I can't take credit for that name-one of my awesome paras came up with it!). Whenever we begin a new unit, everyone has to retrieve their word wallet from their box and bring it to the carpet to receive their new cards. I put their initials on the back of the pictures so if one DOES go missing, we can easily figure out who it belongs to. 

The different sections of the word wallet are labeled-I have them set to topics everyone in my room is working on, but it is easy to make it work for one specific goal or subject area, too! If you wanted to make it a reading word wallet, for example, you could label your sections with sight words, safety words, names, classroom words, and seasonal words.

What do you use in your room to organize student word cards or flashcards? Comment below!! 

Monday, October 12, 2015

Task Analysis Website Share!

As I am preparing my routine task analyses for my kids (I am using this as part of my evaluation this year-they need to be good!), I find myself questioning what the best method to teach them would be. I came across this great website that puts it in SUCH simple terms. I plan to share it with the staff in my room so we are all using common language! This, combined with the prompting hierarchy I have hanging in my room, will help us get on the right track for routine success!

Here is the website I found:
http://www.kcbehavioranalysts.com/aba-toolbox/task-analysis-chaining 

Enjoy!